NOTE:
this racing guide will spoil almost any suprise that's in the track. So you should only
use it if the track drives you nuts and you just can't seem to beat the AI.
General
Tips:
 Start off with
slower cars Start off with
slower cars
This will help you to get familiar with the track. The turns are sharp and the layout is
twisty so you'll get better into the flow while using advanced or beginner cars.
Learn the shortcuts
You'll hardly have a chance of beating the AI if you don't use any shortcuts. The AI knows
most of them, but not all. So you have a much better chance to win the race if you study
the screenshots below
Use the reposition
triggers
Even if you are an excellent driver, you'll get kicked off by the AI or their
weapons from time to time. It might happen that you find yourself in a position where you
must take a extra route to get back onto the track. In this case it is good to know if any
reposition trigger is near you. You can easily drive into it and be immediately
repositioned at a reasonable part of the track.
Racing
Tips:
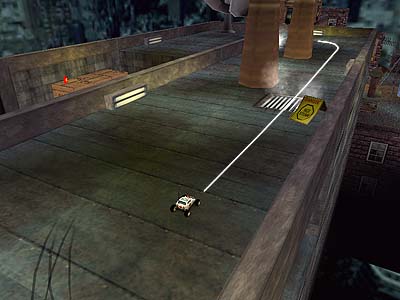
Although I tried to avoid
it, the AI cars tend to pile up right at the start. You can either avoid this by slowing
down a bit and then cutting through a hole - or by taking the route shown in the
screenshot below. This will give you the advantage that you approach the first jump at a
straight angle (what will save you from falling off). The AI won't take this route so
you're pretty much safe with it.
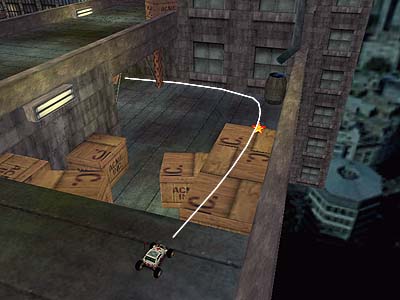
Right after the first jump,
there are 3 possibilities to cross the 2nd roof (see screenshot below). The longest route
to the right is the most obvious and will be taken by the AI most of the time. The middle
route is harder to drive, but will be rewarded with a pickup (AI takes it when necessary).
The route to the left can only be accessed by slower cars (faster cars pass it with the
jump from roof 1 to 2) and won't be taken by the AI. This route only makes sense when you
take the extra shortcut mentioned in the next tip.
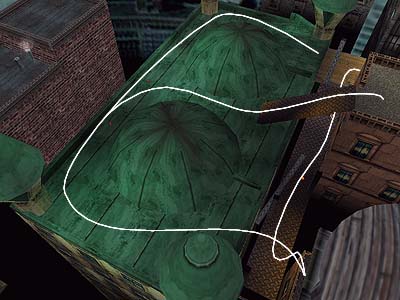
The next area (the
"hot tin roof") will split the field. There are 3 ways to cross it (see
screenshot below): the normal route, the shortcut after the first dome and the
"supadupa daredevil shortcut" :) The normal route is safe and suitable for any
car. The dome shortcut will demand a car with good acceleration, otherwise climbing up the
ramp will cost you more seconds than it'll safe you. This shortcut will be rewarded with a
global star at the end of the upper building. The last shortcut can only be accessed when
you approach the ramp beneath the water tank *very* slow (caution: there's a farce field
that'll speed up your car!) and drop down to the right. If you land on the scaffold below
you can save lots of seconds if you carefully drive on it towards the wooden planks.
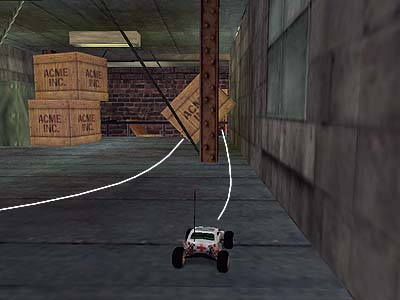
The next shortcut is quite
obvious but can save you a second if taken correct. Almost every car fits between the wall
and the pole (see screenshot below) so you can drive through the gap.
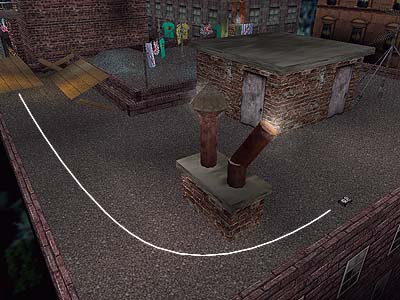
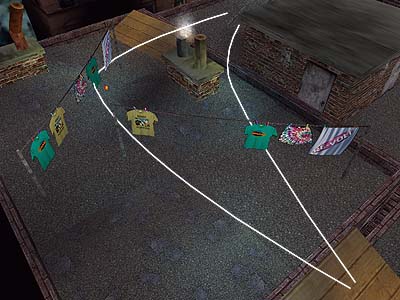
There is a possibility to
avoid the zigzag course around the chimneys on the factory roof (see screenshot below). As
you might have noticed, the vents blow you off the track, not only forward but also to the
side. But there's a tricky way to drive over the right vent without being blown off:
approach it with full speed and steer hard to the left just in the moment your car leaves
the ground. This will make your car stable in the air and let's you fly across the roof in
a straight line. This maneuver will take some practice but it's very well worth it.
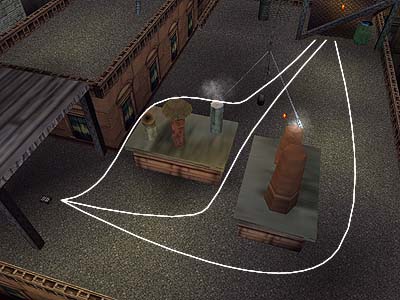
The dropoff on the factory
roof saves another global star on the crates to the right (see screenshot below). Taking
this route has another advantage: you don't have to brake down in order to hit the curve
behind the crates. You can pass the main route in the middle and scratch along the right
wall under the crate (see 2nd screenshot below). This will also give you a
"safer" access to the house.
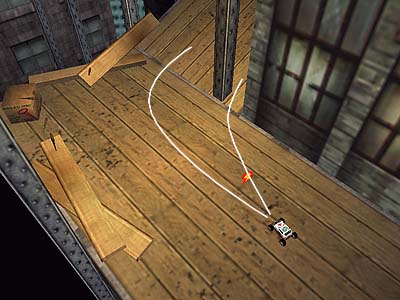
The last shortcut in this
track is quite valuable (see screenshot below). After you jumped off the metal roof, steer
to the right and jump from the chimney elevation right onto the other roof. The AI doesn't
take this shortcut so this will be your last chance to beat them :)
Phew, I hope now
you know how to win this track. If you follow the above tips, you should race lap times
far below one minute. Let me know if you find any
other shortcuts I didn't mention!
<< Back
|